What if the very piece of furniture that frames your sleep is actually the secret source of those morning sniffles or that faint, lingering mustiness? It's a common worry for many of our neighbors who love the plush luxury of fabric but fear the upkeep. You want a bedroom that feels like a sanctuary, yet you might be holding back because you're unsure how to clean an upholstered headboard without causing permanent watermarks or damaging the material.
We understand that your bed is the heart of your home's comfort. You deserve to rest in an environment that's as fresh as it is beautiful. This expert guide provides professional techniques to remove tough stains, eliminate trapped odors, and lift away the hair oils that cause discoloration. We'll show you how to handle delicate fibres with confidence, ensuring your sleeping space remains a dust-free haven. We'll walk you through identifying your fabric type, choosing the right pH-balanced agents, and mastering moisture control. By the end of this article, you'll have a clear, step-by-step plan to make your headboard look and smell brand new again, all while protecting your investment for years to come.
Key Takeaways
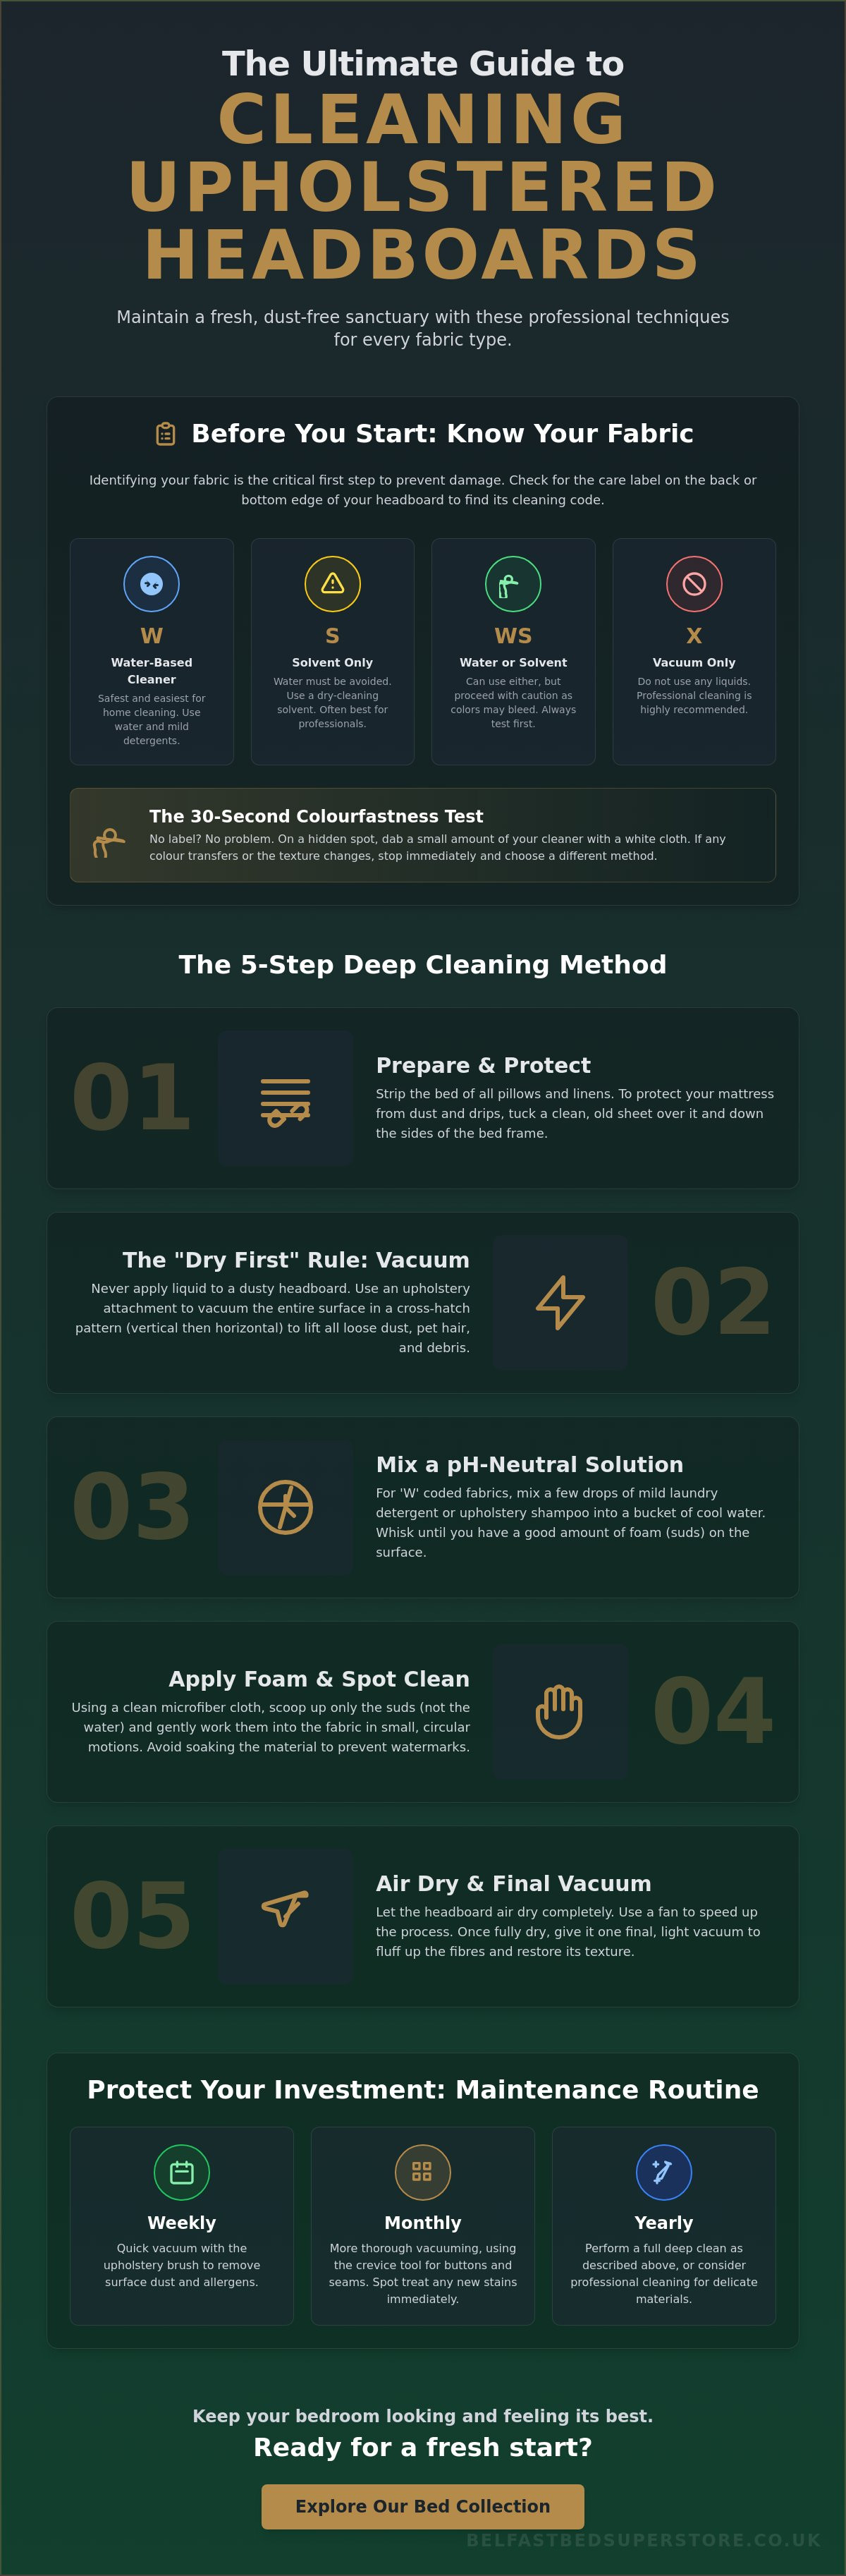
- Learn why identifying your fabric type is the essential first step to prevent damage and where to find hidden care labels on most UK headboard designs.
- Master a professional 5-step method for how to clean an upholstered headboard, including the "dry first" rule that prevents dust from becoming a permanent stain.
- Discover tailored techniques for different materials, ensuring luxury pieces from brands like Hypnos receive the gentle care they require to stay beautiful.
- Understand the science behind stubborn watermarks and organic stains to restore your bed frame's appearance without leaving unsightly brown rings.
- Establish a simple "weekly, monthly, yearly" maintenance routine to keep your sleeping environment dust-free and fresh for the long term.
Understanding Your Fabric: The Essential First Step
Before you reach for a sponge or a bottle of detergent, you need to know exactly what is under your hand. Every fabric tells a story. Understanding the history of upholstery shows us that materials range from rugged, stain-resistant synthetics to incredibly delicate natural wools and silks. Each one requires a specific touch. If you treat a plush velvet headboard with the same heavy hand as a sturdy polyester weave, you risk crushing the pile or creating permanent tide marks that are impossible to remove. We've seen many beautiful pieces damaged by "one-size-fits-all" cleaners that are simply too harsh for the material's specific pH requirements.
Learning how to clean an upholstered headboard starts with the manufacturer’s care label. In many UK designs, these aren't always in plain sight. We recommend checking the very bottom edge of the board or the reverse side that faces the wall. If you have one of our upholstered bedsteads, you might even find the tag tucked into a seam near the side rails. This label is your roadmap; it tells you whether the fabric can handle water or if it needs a solvent-based approach. For natural fibres like cotton or wool, using a pH-neutral cleaner is vital. High-alkaline detergents can strip the natural oils from the fibres, leaving them brittle and prone to fraying.
Decoding Upholstery Cleaning Symbols (W, S, WS, X)
The symbols on your headboard's tag are a shorthand for safety. A "W" means you can use water-based cleaners, which is the most straightforward category for home maintenance. An "S" stands for solvent, meaning you must avoid water entirely to prevent shrinking or staining. The "WS" code is a hybrid, but it carries a risk of "bleeding" colours if you aren't careful. Finally, an "X" means the fabric is vacuum-only. If you see this on your bed frame, it's best to call in a professional to avoid ruining the delicate weave. Understanding these codes is the best way to ensure your bedroom stays fresh without any costly mistakes.
The 30-Second Colourfastness Test
If your tag is missing or illegible, don't panic. You can perform a quick test to see how the fabric reacts to your chosen cleaner. Pick an inconspicuous area, usually the back of the headboard where it rests against the wall. Apply a tiny amount of your cleaning solution to a white cloth and dab the fabric gently. Don't saturate the internal padding, as trapped moisture can lead to musty smells later. Wait about 30 seconds and check the white cloth for any dye transfer. You should also look for signs of shrinking or changes in the fabric's texture. This simple step gives you the confidence to proceed with the rest of the headboard, knowing your fibres are safe.
The 5-Step Deep Cleaning Method for Upholstered Headboards
Cleaning your bed shouldn't feel like a chore. By taking a few minutes to prep the area properly, you'll save yourself from accidental spills and ensure a much deeper clean. Start by stripping the bed and moving pillows well away from the work zone. We always recommend tucking an old, clean sheet over your mattress and down the sides of the bed frame. This simple shield protects your bedding from any stray cleaning foam or dust that might fall during the process. Mastering how to clean an upholstered headboard involves a systematic approach that prioritises fabric health over brute force.
The most important piece of advice we can give is the "Dry First" rule. You should never apply water or cleaning solutions to a dusty headboard. When moisture hits settled dust, it creates a thin layer of mud that gets pushed deeper into the fabric fibres as you clean. This often results in those stubborn greyish streaks that are so hard to remove later. While some experts suggest 6 steps to clean an upholstered headboard, we've found that focusing on these five core stages delivers the best results for our local customers.
Step 1 & 2: Power Vacuuming and Dust Removal
Start with your vacuum’s upholstery tool. We recommend using a "cross-hatch" technique, which means vacuuming vertically and then horizontally across the entire surface. This is especially helpful for textured fabrics like linen, as it lifts dust trapped deep within the weave. Don't forget the crevice nozzle for the edges and buttons where allergens love to hide. If you share your home with pets, a quick pass with a sticky lint roller is your best friend. It picks up those fine hairs that vacuum brushes sometimes miss, ensuring the surface is completely clear before you introduce any moisture.
Step 3, 4 & 5: Spot Cleaning, Misting, and Extraction
Once the dust is gone, it's time for the wet clean. Instead of soaking the fabric, create a gentle cleaning foam in a bowl and apply only the suds with a soft sponge. This "misting" approach keeps the internal padding dry. Always remember to blot the fabric rather than rubbing it. Rubbing can ruin the delicate pile of the fabric and spread the stain further. Finally, use a clean, dry microfibre cloth to "extract" the moisture. Press it firmly against the damp areas to pull the liquid out of the fibres. If your current piece is starting to show its age despite your best efforts, you might consider refreshing your space with one of our new upholstered headboards.
The final drying phase is just as critical as the cleaning itself. Ensure the room is well-ventilated by opening a window or using a small fan to circulate the air. You want the fabric to dry as quickly as possible to prevent any musty smells or mould from developing in the internal foam. A fresh, dry headboard not only looks better but also contributes to a much healthier sleeping environment for you and your family.
Material-Specific Techniques: From Velvet to Wool
Different fabrics demand different rules. While a sturdy polyester might handle a bit of scrubbing, high-end pieces from brands like Hypnos or Relyon feature intricate weaves and natural fibres that need a lighter touch. If you're wondering how to clean an upholstered headboard made of premium materials, the key is patience. You aren't just removing dirt; you're preserving the texture and "hand" of the fabric. This term refers to the physical sensation of the material against your skin, which can become stiff or "crunchy" if you use too much detergent or the wrong technique.
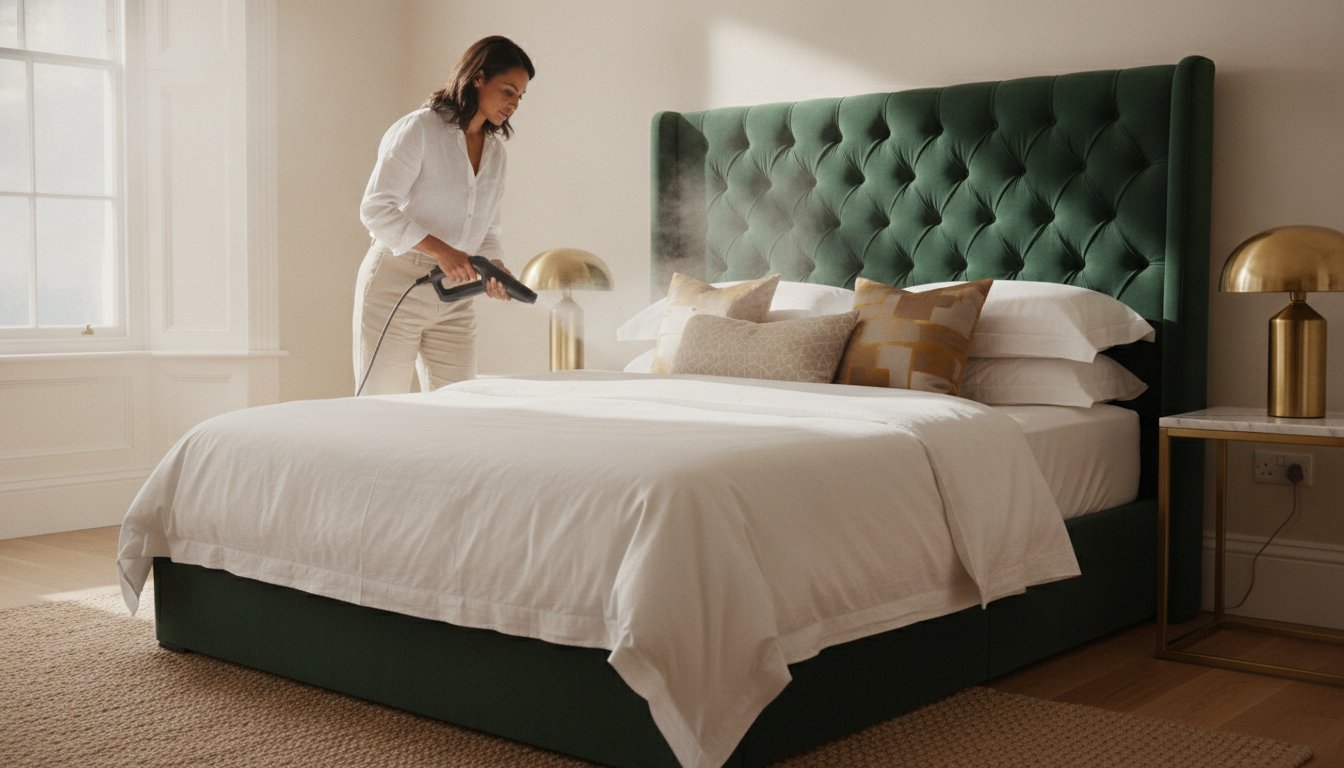
Steam is a powerful tool for sanitising, but use it with caution. It's excellent for killing dust mites and lifting light oils, but excessive heat can melt certain synthetic fibres or cause natural wool to shrink. Always keep the steamer moving and never hold it in one spot for more than a second. For a deeper look at general fabric care, this upholstery cleaning guide offers fantastic insights that apply perfectly to your bedroom furniture. Once the fabric is dry, you can restore its softness by gently vacuuming again with a clean brush attachment.
Cleaning Velvet and Chenille Headboards
Velvet is notoriously sensitive to pressure. You might have seen the "Pot Lid" hack online, where a cloth-wrapped lid is used to steam the fabric. While this works for some, we suggest being very careful with premium velvets. The weight of the lid can leave permanent "crush marks" that ruin the look of the bed. To restore the nap, which is the direction the fibres lay, use a soft-bristled clothes brush while the fabric is still slightly damp. Brush in one direction to ensure a uniform, luxurious sheen once it dries completely.
Working with Linen, Cotton, and Wool Blends
Natural fibres have their own quirks. Linen is beautiful but prone to water spotting. If you get one area too wet, you'll likely see a brown ring as it dries. The trick is to clean the entire panel evenly rather than just one spot. For wool blends, temperature control is your top priority. Using hot water will cause the fibres to tighten and shrink, potentially pulling the fabric away from the headboard's frame. If you have a busy family home with pets or young children, choosing a synthetic polyester from our Sealy or Birlea Furniture ranges is often the smartest move. These materials are designed for durability and are much more forgiving when it comes to routine maintenance.
Troubleshooting Tough Stains and Avoiding Watermarks
Have you ever tried to spot-clean a tiny mark only to end up with a large, brown-edged ring? It is a common frustration for many of our neighbors. This happens because "clean" water acts as a vehicle, carrying microscopic dust and sediment from the internal padding to the surface as it evaporates. Mastering how to clean an upholstered headboard involves understanding this soil migration. If you catch a spill early, such as morning coffee or tea, your immediate emergency ritual should be blotting with a clean, dry cloth. Never rub the area. Rubbing pushes the liquid deeper into the frame and can permanently damage the fabric's delicate weave.
The most frequent issue we see is the "dark patch" where your head rests. These are organic stains caused by a combination of hair oils, sweat, and skin cells. Over time, these oils oxidize, becoming sticky and resistant to standard soap and water. You will need a specialized upholstery degreaser that breaks down these proteins without saturating the fibres. Regular dusting, which we covered in our vacuuming section, is your best preventative measure against this buildup. If your current piece is beyond saving, you can explore our full range of headboards and bedsteads today for a fresh, clean start.
Removing the "Dark Patch" from Hair Oils
Body oils are tricky because they bond with the fabric rather than just sitting on the surface. Standard dish soap often fails here because it is not designed to handle oxidized organic matter. Instead, use a pH-balanced degreaser specifically formulated for upholstery. Apply it sparingly to a microfibre cloth first, then dab the area gently. This prevents the solution from soaking into the internal foam. If the staining has compromised the look of your room, refreshing your space with one of our upholstered bedsteads can provide a durable and stylish solution.
The "Ghosting" Technique for Watermark Removal
If a watermark has already appeared, you can often fix it using a technique called "ghosting." This involves lightly dampening the area from the centre of the ring outwards, carefully blending the edges into the surrounding dry fabric. By creating a "damp-to-dry" gradient, you prevent a hard line from forming as the moisture evaporates. Some people use a hairdryer on a cool setting to speed up the process, but you must be careful. High heat can set stains permanently or even melt synthetic fibres. Keep the dryer at least six inches away and keep it moving constantly to ensure a uniform finish across the material.
Protecting Your Investment: Maintenance and When to Upgrade
Maintaining a beautiful bedroom is about consistent care rather than occasional heroics. Once you've mastered how to clean an upholstered headboard using the professional techniques we've discussed, the next step is protecting that investment. For high-quality pieces from brands like Sealy or Relyon, a regular maintenance schedule is the difference between a headboard that lasts a few years and one that stays fresh for a decade. We recommend a simple "Weekly, Monthly, Yearly" approach. Every week, give it a quick vacuum to stop dust from settling. Once a month, inspect the fabric for any emerging spots from hair oils. Once a year, follow the deep cleaning method we've outlined to pull out deep-seated allergens.
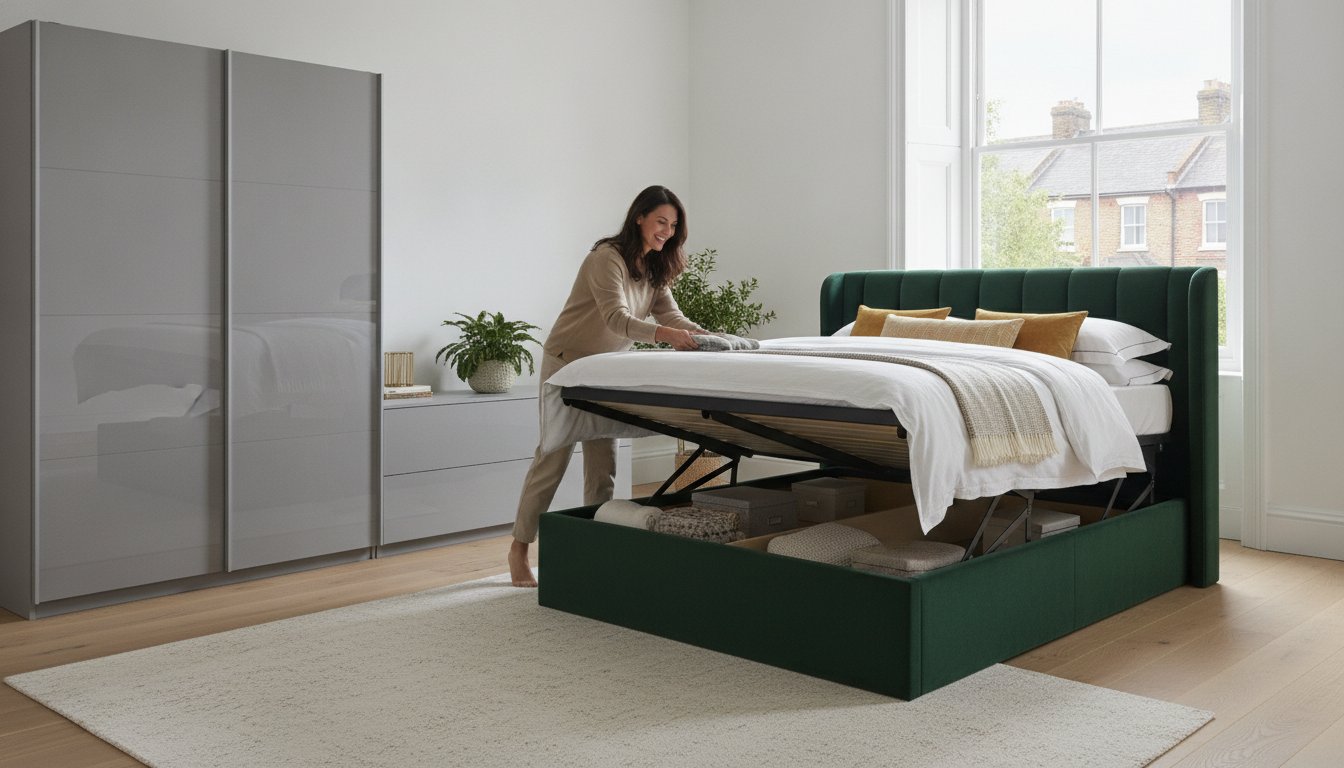
You might wonder if fabric protectors are worth the extra effort. For family homes or those who enjoy breakfast in bed, these treatments are a lifesaver. Modern fabric protectors create an invisible barrier that causes liquids to bead on the surface rather than soaking into the delicate fibres. This gives you those vital extra seconds to blot away a spill before it becomes a permanent watermark. Many modern upholstered bedsteads now come with pre-treated fabrics, making how to clean an upholstered headboard easier than ever before. These treatments don't change the feel of the material, so you still get that plush, luxurious sensation every time you lean back to read.
Daily and Weekly Habits for a Cleaner Headboard
Small changes in your routine can significantly reduce how often you need to perform a deep clean. We often suggest the "Pillow Barrier" method to our customers. By placing a decorative sham or extra pillow behind your head, you create a physical shield that prevents hair oils and skin cells from reaching the upholstery. It's also vital that you never lean against your headboard with wet hair. Moisture can cause certain dyes to bleed or create the very watermarks we worked so hard to avoid in the previous section. A quick ten-second wipe with a dry microfibre cloth as you make the bed each morning keeps the surface looking crisp.
Signs It Is Time to Replace Your Upholstered Headboard
Even with the best care, there comes a time when a refresh is the healthiest choice for your home. If you notice persistent "pilling" or frayed fibres that catch on your skin, the material's integrity has likely broken down. Lingering smells that survive a thorough deep clean are usually a sign that bacteria or allergens have taken hold in the internal foam padding. This is particularly important for allergy sufferers; if your bed triggers sniffles despite regular cleaning, deep-seated dust mites might be the culprit. Evaluating the structural feel is also key. If the padding feels lumpy or the frame feels loose, it's a clear signal that your sanctuary needs an upgrade to maintain the comfort and support you deserve.
Ready for a Fresher, Healthier Night's Sleep?
Maintaining a beautiful bedroom starts with the right techniques and a little bit of patience. You now understand that identifying your specific fabric cleaning code is the vital first step toward safety. By following the "dry first" vacuuming rule and mastering the art of blotting rather than rubbing, you can confidently manage how to clean an upholstered headboard without the fear of permanent watermarks. These simple habits don't just restore the beauty of your furniture; they create a dust-free environment that supports your physical well-being every single night.
If your current headboard has seen better days or if deep-seated allergens mean it's time for a change, we're here to help you start fresh. As a family-run specialist since 1990, we take pride in offering expert advice on premium brands like Hypnos and Sealy. Whether you're looking for a durable synthetic or a luxurious natural weave, you can explore our range of premium upholstered headboards and bedsteads today. We'll even handle the heavy lifting with our national UK delivery and professional assembly service. You deserve a sleeping space that feels as good as it looks, so take that first step toward a more comfortable home today.
Frequently Asked Questions
Can I use a steam cleaner on my upholstered headboard?
You can use a steam cleaner, but you must check your fabric's cleaning code first. Steam is excellent for killing bacteria and lifting light oils, but excessive heat can melt certain synthetic fibres or cause natural wool to shrink. Always keep the nozzle moving and never hold it in one spot for more than a second. This ensures you sanitise the surface without saturating the internal padding.
How do I remove the smell of sweat from my fabric headboard?
An enzyme-based upholstery cleaner is the most effective way to break down the proteins in sweat and body oils. For a more natural approach, a light mist of one part white vinegar to three parts water can help neutralise odours. As we mentioned in the troubleshooting section, these organic stains can oxidise over time, so it's best to treat them as soon as you notice a faint smell.
Is bicarbonate of soda safe to use on all headboard fabrics?
Bicarbonate of soda is generally safe as a dry deodorizer for most fabrics, but you should always perform a small test first. Sprinkle a thin layer over the dry headboard, let it sit for 20 minutes, and vacuum it away thoroughly. Avoid using it on wet fabric, as it can clump and become difficult to remove from the weave. It's a fantastic, low-cost way to keep your bed smelling fresh.
How long does an upholstered headboard take to dry after cleaning?
Most headboards will take between 4 and 12 hours to dry completely after a deep clean. This timeframe depends heavily on the room's temperature and humidity levels. We recommend opening a window or using a small fan to circulate the air. Ensuring the fabric dries quickly is the best way to prevent any musty smells from developing in the internal foam.
What is the best way to clean a tufted headboard with buttons?
The best way to clean a tufted headboard is to pay special attention to the deep folds around the buttons. Use your vacuum's crevice tool to pull out hidden dust and allergens that settle in these pockets. For spot cleaning, a cotton swab dipped in a gentle cleaning foam allows you to reach tight spaces without soaking the surrounding material. This detailed approach keeps the intricate design looking sharp.
How do I get rid of dust mites in my fabric headboard?
Using a vacuum with a HEPA filter is your first line of defence against dust mites. These tiny pests thrive on skin cells, so regular maintenance is key. Occasional low-heat steam cleaning can also help, as the heat kills mites on contact. If you suffer from severe allergies, following our "weekly, monthly, yearly" schedule is the best way to maintain a healthy sleeping environment.
Can I use biological laundry detergent on upholstery stains?
You should avoid using biological laundry detergent on your headboard. The enzymes designed to break down stains in a washing machine are often too aggressive for upholstery and can damage the fibres. Instead, stick to a pH-neutral upholstery cleaner. This ensures you remove the mark without stripping the natural oils or changing the texture of your fabric, which is essential for preserving the material's "hand."
How often should I professionally clean my headboard?
We suggest having your headboard professionally cleaned every 12 to 18 months to maintain its appearance and hygiene. If you live in a home with pets or suffer from dust allergies, you might want to increase this frequency. Learning how to clean an upholstered headboard yourself is great for routine care, but a professional deep clean reaches the deep-seated soil that domestic tools sometimes miss.